
How to install Sporty’s Honeycomb Bravo Profiles with X-Plane 12 (Version 2)
(This article as well as the Honeycomb Bravo Profiles for X-Plane 12 have been updated as of 4/5/2023)
X-Plane is referred to as the “most realistic flight simulator” by PC Gamer and is continuously recommended by seasoned simmers when asked what’s the best simulator for at-home use. From a hardware standpoint, the Honeycomb Bravo is one of the most popular flight sim pieces out there. Within minutes we can change the levers on the Honeycomb Bravo from a single engine GA aircraft such as a Cessna 172 into a four engine commercial airliner (think a Boeing 747).
The challenge is making sure that our new hardware configuration is understood by X-Plane 12, which can be a tedious task each time we make a lever change. For that reason, Sporty’s provides preconfigured airplane profiles for X-Plane 12 that will make the transition between different aircraft seamless.
Instructions for installing Sporty’s Honeycomb Bravo Profiles with X-Plane 12
Step 1
The first thing we want to do is find the X-Plane 12 root folder. This is where the X-Plane application is located as well as additional folders instrumental to the program.

Step 2
Next, open up the “Output.zip” folder that is included in your “Thank you” email for your purchase of the Honeycomb Bravo. Double click the .zip file and you should create a folder labeled “Output”

Step 3
Drag the “Output” folder into your X-Plane root folder and drop it in a blank area of the root folder.

Step 4
The Output folder’s content direction will port the profiles into the “control profiles” section of your X-Plane folder. You can double check that the files reached their destination by clicking the “Output” folder in your root folder -> “preferences” folder -> “control profiles” folder:

Step 5
Start up X-Plane 12, navigate to the Joystick Settings page and you will have five new Honeycomb Bravo profiles (each labeled V.2 indicating the updated profiles) within your “Active Profile” drop down box:

Below are the Honeycomb Bravo lever configurations that will coordinate with the five preconfigured profiles:
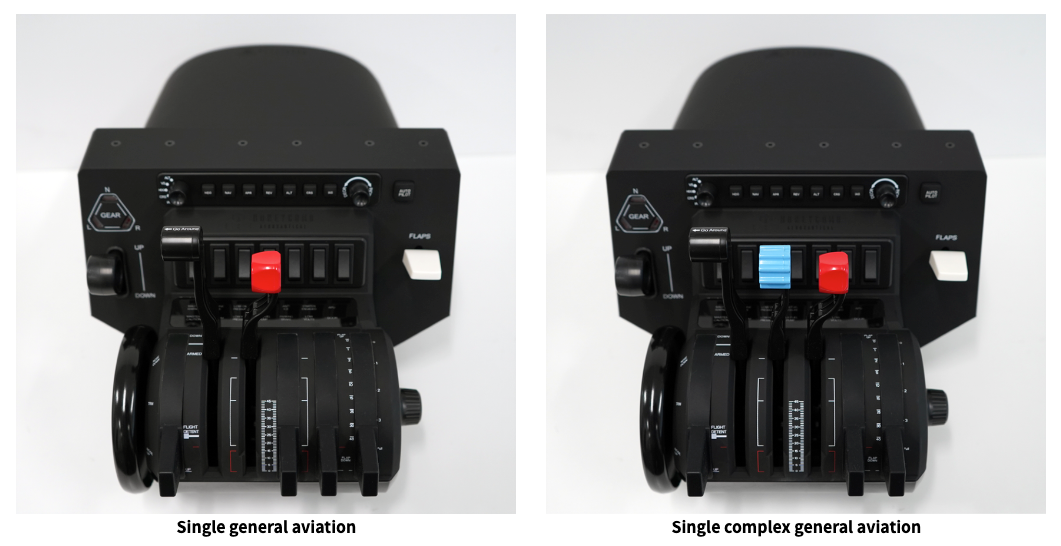
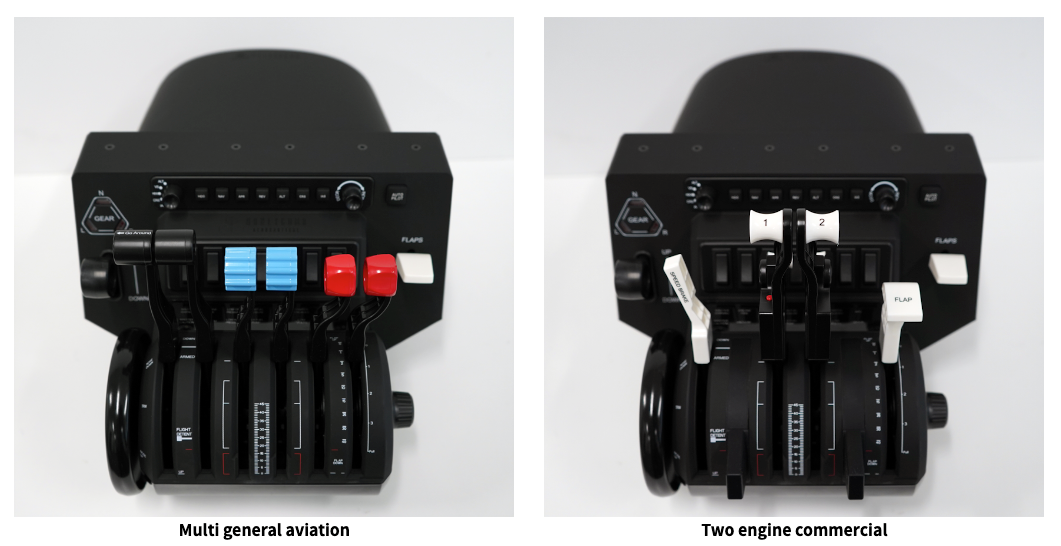
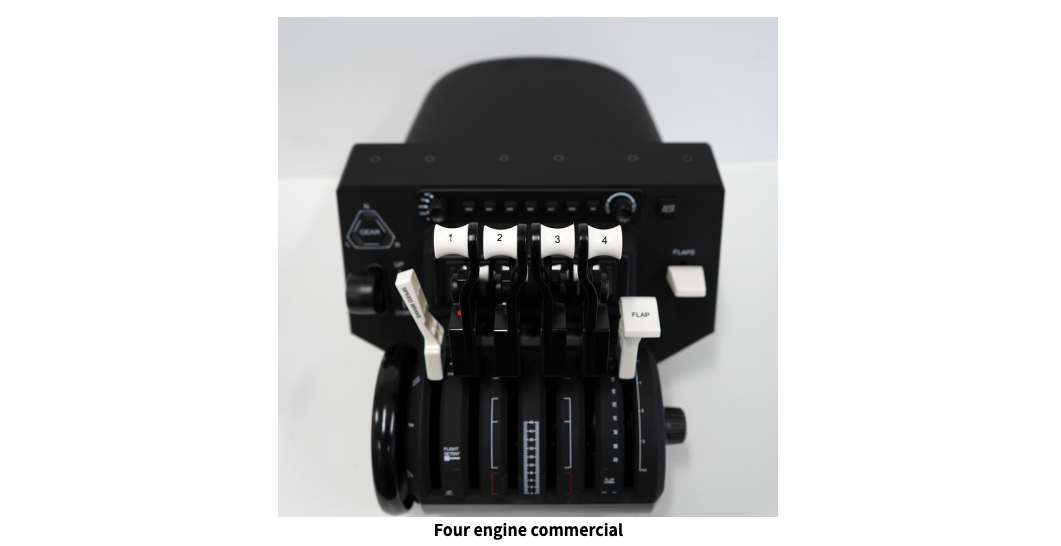
These profiles will accommodate the correct levers and their intended purposes—the trim wheel, gear lever, and flap lever will operate as preferred. The autopilot commands are limited but the main buttons (HDG, NAV, APR, REV, ALT, VS, IAS) will set the applicable modes in the digital aircraft’s profile and the Increase/Decrease knob to the right of these buttons will increase or decrease the selected vertical speed commands in increments of 100 FPM. The “AUTO PILOT” button on the far right side of the Bravo acts as an “autopilot disconnect” command. Lastly, the Commercial Engine configurations will apply thrust reverser mode when the levers are full aft and reverser latches are pulled up.
A link to download these preconfigured profiles will be provided on your order receipt page when purchasing a Honeycomb Bravo Throttle from Sporty’s Pilot Shop.
We hope these profiles help you to enjoy using the Honeycomb Bravo Throttle Quadrant with X-Plane 12 and have fun digitally flying!
")


i have been a long time advocate of Sporty’s service and contribution to the world wide flying community.
Their series of flight training CD’s helped me obtain my Pilots licence here in Australia, and their help with the sim community is second to none.
Regards
Noel